Creating a dark side subgraph
In my previous article Developer Superpowers with The Graph, we discussed the infinite power that comes with the ability to make queries to The Graph’s subgraph ecosystem. If you check out the The Graph Explorer, you’ll see a bunch of official subgraphs for almost all of the big protocols out there. And if you scroll down to the “Community Subgraphs” section… well, it’s pretty much endless.
If there’s some kind of question that you’d like to ask the Ethereum network-god, chances are, you’ll be able to answer it by making a few queries to the existing subgraphs. If you can’t find the information tho… —and this is a revelation I recently had— you can spin up a subgraph and build the machine that will answer your own question!
The point I’m making here is that subgraphs are not only useful as the backbone of a dapp, but they’re also useful for hacking. Or research, or whatever you want to call it. Overkill, you say? Definitely no, once you see how trivial it is to create a subgraph. Everyone’s using it. Hackers are using it. Even Kylo Ren.

Kylo Ren, waiting for his subgraph to sync.
Or you might just want to learn how to build a subgraph for your dapp. Either way, this guide will show you the way, no matter if its light or dark.
So, let’s crush “creating subgraphs” shall we?
Bonus: Need some music to concentrate while you read this? http://musicforprogramming.net
What to ask?
So, with this hacker mentality in mind, let’s find a question that we want to ask. We will build a subgraph specifically to answer this question, and then dump it. Probably not what the The Graph team intended their tech for (sorry guys!).
This is the question we will try to answer:
“Are there any ERC777 tokens listed on Uniswap v1?”
Note: Why would anyone ask that? Honestly, I have no idea.
Where to begin?
The Graph’s docs are awesome —Undoubtedly one of the best documentations I’ve ever seen in Ethereum. And oh yes, they look funky af.
However, extensive documentations like this tend to be a bit intimidating when you first bump into them.
Do I need to read all this to be able to do something? Do I need to learn GraphQL first, and then come back? Well, the answer is no.
You just need to build something and get the general idea, then iterate, and from that point on use the documentation as a mere reference. As a dev, you probably know the drill pretty well by now, right? There’s nothing special in this case.
I do recommend giving them a full read after you get the basic idea though, their full of super valuable details and nuances.
Bootstraping the project
You can try their quick start guide, but I found that its much easier to just work with a remote subgraph from the start, and not host your subgraph locally as the guide suggests. This makes the process soooo much easier.
So, we’ll be trimming that part from the guide, and thus ignoring anything related to hosting your own graph node. You can always return to doing that once you are hungry for more.
So, go ahead and fetch the “graph-cli” application.
We’ll be using it to:
create a subgraph template,
compile it,
and upload it to the The Graph Explorer.
graph-cli is actually all you need to do all of this.
yarn global add @graphprotocol/graph-cligraph --versionCool?
Now, the “create-react-app” of The Graph is built into the tool. It’s these little details that make you fall in love with this tech 💖.
Let’s create our project then:
graph init --from-example <your-github-username>/<your-subgraph-name>In my case, its
graph init —from-example ajsantander/erc777-uniswapYeah, its kinda weird that you have to bring your Github user into the mix. (If anyone from The Graph is reading this, perhaps you could tell us why in the comments section?). Its not like this is going to push stuff to your Github account or anything, or perform any remote action for that matter. I suppose that its just a way of associating subgraphs with a team, and make it easier for people to find official subgraphs.
Anyways, once you hit enter, you’ll see a few prompts. Just say yes and let the program build your project.
Removing excess weight
The bootstrapped project looks like this:
~/erc777-uniswap/
> abis/
> bin/
> contracts/
> generated/
> migrations/
> node_modules/
> src/
  .gitignore
  LICENSE
  package.json
  README.md
  schema.graphql
  Session.vim
  subgraph.yaml
  truffle.js
  yarn.lock
And if you peek in package.json, you’ll find these scripts:
  "scripts": {
    "build-contract": "solc contracts/Gravity.sol --abi...",
    "create": "graph create ajsantander/erc777-uniswap...",
    "create-local": "graph create ajsantander/erc777-uni...",
    "codegen": "graph codegen",
    "build": "graph build",
    "deploy": "graph deploy ajsantander/erc777-uni...",
    "deploy-local": "graph deploy ajsantander/erc777-uni..."
  }
If you were to run “yarn build-contract”, you’d be using solc to compile the contracts into the “abi/” and “bin/” folders.
Well, you know what? We won’t be compiling any contracts here, we’ll just be using compiled abis that we grab from Etherscan, so you can go ahead and delete the “bin/” and “contracts/” folders. Keep “abis/” tho. I usually don’t find the need to compile contracts when I’m subgraphing.
VSCode Synthwave x Fluoromachine theme, used by Kylo Ren exclusively for subgraphing.
Which brings us to Truffle… Ahh Truffle. Let us ask ourselves this question: what does Truffle actually do? It allows you to compile, run tests, set up a console to interact with contracts… etc. None of which we’ll be doing here! So, bye bye. I don’t know about you, but I love it when this happens. Delete truffle.js and the ever so useful “migrations/” folder as well.
And if you wanna be all tidy about it, you can also delete the Truffle dependencies in package.json file, as well as the “build-contract'“ script. Heck, let’s just give in to our thanatos and also delete the “create”, “create-local”, “build” and “deploy-local” commands. Build is probably useful for something, but I never use it. The rest are for deploying subgraphs locally.
You should end up with something like this:
~/erc777-uniswap/
> abis/
> generated/
> node_modules/
> src/
  .gitignore
  LICENSE
  package.json
  README.md
  schema.graphql
  Session.vim
  subgraph.yaml
  yarn.lock
And a package.json like this:
{
  "name": "maker-terminator",
  "version": "0.1.0",
  "scripts": {
    "codegen": "rm -rf generated/*; graph codegen",
    "deploy": "graph deploy ajsantander/erc777-uni..."
  },
  "devDependencies": {
    "@graphprotocol/graph-cli": "^0.18.0",
    "@graphprotocol/graph-ts": "^0.18.0"
  },
  "dependencies": {
    "babel-polyfill": "^6.26.0",
    "babel-register": "^6.26.0"
  }
}
Having done this cleansing, let’s finally speak about the unusual entities that survived the purge.
“generated/” is a folder that will be populated with stuff (you’ll see what in a minute) whenever you run “yarn codegen”. Notice that I modified this script a bit, so that it also deletes whatever was in this folder before.
“schema.graphql” is where you tell your subgraph what entities it will have, which defines the queries that you’ll be able to run once this thing is up and running. Eg. a query like “query { tokens { id } }” would refer to a “Token” entity.
“subgraph.yaml” is how you tell your subgraph which contracts to scrape in the chain, which events to watch out for, etc, and which source files will be processing the incoming data in the “src/” folder.
And we’ll be calling “yarn deploy” whenever we want to upload our subgraph to the The Graph Explorer.
That’s it. everything else is the usual stuff you’ve probably seen a million times by now.
I took you through this cleansing process so that you can appreciate what’s really needed to produce a working subgraph. This is the critical stuff, the rest are nice to haves —noise.
We have our canvas. Now let’s paint.
Detecting entries in the registry
Erc777 tokens are like the usual Erc20 tokens, but save users the trouble of having to provide allowance in one tx, and then transfer them in another. Which is nice! They also introduce a lot of security vulnerabilities unfortunately, so that’s why they haven’t really gained adoption, and I doubt they ever will (I’m hoping that something better comes around).
If you check out the EIP-777 specification, you’ll notice that these tokens are required to register in a common EIP-1820 registry. So, in theory, Erc777 tokens will call this registry’s “setInterfaceImplementer(…)” function, with the hash of the string “ERC777Token”. If that call emits an event, then we have our entry point for finding Erc777 tokens.
The official mainnet registry is “0x1820a4B7618BdE71Dce8cdc73aAB6C95905faD24”.
Let’s take a look at the code: https://etherscan.io/address/0x1820a4B7618BdE71Dce8cdc73aAB6C95905faD24#code
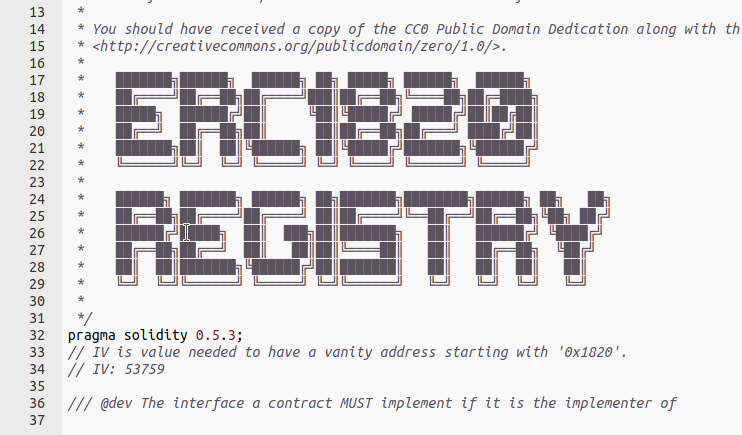
Bingo. Line 108 => “emit InterfaceImplementerSet(addr, _interfaceHash, _implementer);“
We need to set up our subgraph so that it picks up these events.
First, we need to tell it to look at this contract, and then, to listen to the event. Change the original subgraph.yaml manifest file to this:
specVersion: 0.0.2
schema:
  file: ./schema.graphql
dataSources:
  - kind: ethereum/contract
    name: TokenRegistry
    network: mainnet
    source:
      address: '0x1820a4B7618BdE71Dce8cdc73aAB6C95905faD24'
      abi: TokenRegistry
      startBlock: 7496550
    mapping:
      kind: ethereum/events
      apiVersion: 0.0.4
      language: wasm/assemblyscript
      entities:
        - RegisteredToken
      abis:
        - name: TokenRegistry
          file: ./abis/TokenRegistry.json
      eventHandlers:
        - event: InterfaceImplementerSet(indexed address,indexed bytes32,indexed address)
          handler: handleInterfaceImplementerSet
      file: ./src/mapping.ts
We’re defining a “TokenRegistry” static data source. We tell it the contract’s address in mainnet, and which block it was deployed at. There’s no point in looking at previous blocks, since the contract did not exist before that.
Tip: To find the creation block of a contract in Etherscan, you can scroll up to the “ContractCreator: 0xa990077c3205cbdf861e17fa532eeb069ce9ff96 at txn 0xfefb2da535e927b85f” part and see when that transaction occurred.
We also define the data source’s abi. Simply copy the abi from Etherscan as well, and paste it into an “abis/TokenRegistry.json” file. It may seem a bit redundant how this abi is specified multiple times in the subgraph.yaml manifest file, but it makes sense. Kind of, I guess.
In the “entities” section, we’re associating the data source with some “Token” entity. Apparently, The Graph needs to be aware of which entities it will be interacting with when you define a data source. We won’t be creating this entity just yet. Don’t worry about it for now.
In the “eventHandlers” section, we specify the signature of the event that we want to target, and finally, notice how we link to the file “./src/mapping.ts”. This little dude will have a function that is called whenever the subgraph is indexing, and detects one of these events we’re listening to.
Go ahead and run “yarn codegen”. If all goes well, and you see no errors, you should see a “TokenRegistry/TokenRegistry.ts” file under “generated/”. This is an auto generated Typescript-ish file that represents the interface of the Erc1820 token registry contract. It was created from the abi that we brought in from Etherscan, and graph-cli knew about it because we declared it in the subgraph.yaml manifest file.
Now, let’s go to “./src/mappings.ts”. Delete everything but the first import. Replace it with this:
import { InterfaceImplementerSet } from '../generated/TokenRegistry/TokenRegistry'All we’re doing here is importing the abi for this InterfaceImplementerSet event that the registry emits whenever the “setInterfaceImplementer(…)” is called.
Now, also add this import:
import { log } from '@graphprotocol/graph-ts'“graph-ts” is a library that provides useful tools for processing stuff while a subgraph indexes. In this case, “log”, is nothing more than a “console.log” that will be handy for debugging.
Next, let’s implement the mapping function that we declared in the manifest, with the exact same signature we said it’d have:
export function handleInterfaceImplementerSet(event: InterfaceImplementerSet): void {
	log.error("Implementer set {}", [event.params.addr.toHexString()])
}
These mapping functions or reducers, receive the event that triggered them, in this case, the InterfaceImplementerSet event. In the function body, we’re using “log.error” to trace the “addr” parameter of the incoming event.
Why “error”? I simply prefer that to “info” or “debug” when debugging because it makes the logs easier to find in the The Graph Dashboard. Which is where we’re going next, because this baby is ready to be deployed!
Deploying the subgraph
Head over to The Graph Dashboard. You obviously need to sign up first. You should see an api-token displayed in your dashboard. Take note of it.
Then click on “add a subgraph”. Create a new subgraph with a name that is compatible with how you named your project. In my case, my project is “erc777-uniswap”, so I named my subgraph “Erc777 Uniswap”. The pattern is some sort of camel case with spaces.
Now, go back to your package.json file and modify the “deploy” script to include your api-token, like this:
"deploy": "graph deploy --access-token <your_access_token> <all_the_other_stuff>"Now run “yarn deploy”! Hopefully, you didn’t get any errors.
Head over to your dashboard and into your subgraph’s page. Mine is at https://thegraph.com/explorer/subgraph/ajsantander/erc777-uniswap.
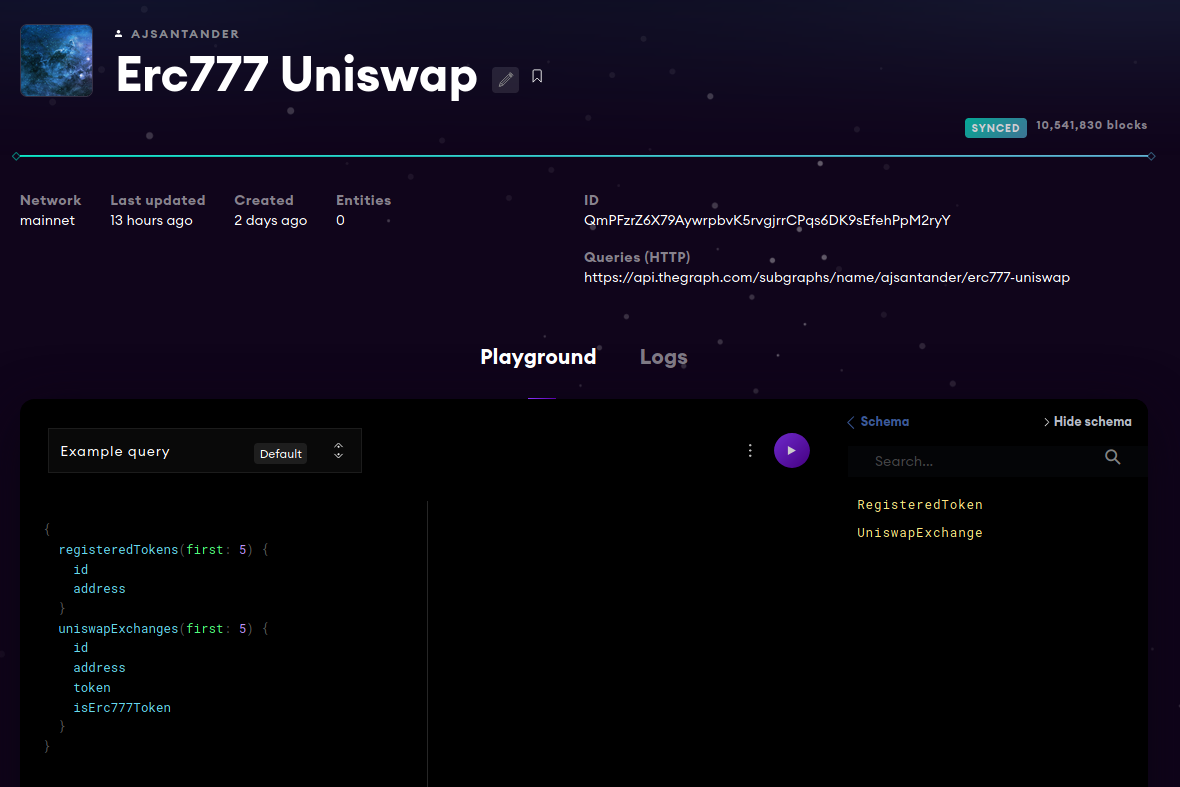
You should see it indexing, slowly consuming blocks from the start block we specified in the manifest file, all the way up to the latest block in mainnet.
If you go to the “logs” tab, and click on “error”, you should see our subgraph picking up all the events:
Implemented set 0x80eed555721e5ff5d4ebf167dd827509e5420b9f, data_source: TokenRegistry, block_hash: 0x8b5b107b8194195e08dc4a137301e2164d2190d2743a3eba7ccf20f1e6e3aa0d, block_number: 7778366
...
Now, we can’t actually make any queries yet, because we didn’t define any entities. But we’ll do that soon enough.
This is picking up all the calls to the “setInterfaceImplementer(…)” function. We’re only interested in calls where the “interfaceHash” relates to “ERC777Token”, or “0xac7fbab5f54a3ca8194167523c6753bfeb96a445279294b6125b68cce2177054“.

This should be pretty easy right? Just add this filter to the top of the reducer.
if (event.params.interfaceHash.toHexString() != '0xac7fbab5f54a3ca8194167523c6753bfeb96a445279294b6125b68cce2177054') {
  return
}
Deploy again! We should be tracing fewer entries now, and all should be Erc777 tokens. Go ahead and peek at a few of those in Etherscan. It shouldn’t take long before you find one that has verified code, and so you can confirm that its indeed an Erc777 token.
Snooping Uniswap markets
Now, let’s do a similar thing to detect Uniswap (v1) exchanges. Here’s the factory contract used to create the exchanges: https://etherscan.io/address/0xc0a47dFe034B400B47bDaD5FecDa2621de6c4d95#code
This thing is written in Vyper. Yikes! No worries, it’s easy enough to look at the code and figure out that the function that is called to create a new exchange is “createExchange(…)” which emits a “NewExchange” event =P
So, let’s create a new data source and bring in the relevant data (just add it after the last line of code in subgraph.yaml):
  - kind: ethereum/contract
    name: UniswapFactory
    network: mainnet
    source:
      address: '0xc0a47dFe034B400B47bDaD5FecDa2621de6c4d95'
      abi: UniswapFactory
      startBlock: 6627917
    mapping:
      kind: ethereum/events
      apiVersion: 0.0.4
      language: wasm/assemblyscript
      entities:
        - UniswapExchange
      abis:
        - name: UniswapFactory
          file: ./abis/UniswapFactory.json
      eventHandlers:
        - event: NewExchange(indexed address,indexed address)
          handler: handleNewExchange
      file: ./src/mapping.ts
And don’t forget to create the file “abis/UniswapFactory.json” and copy paste its abi from Etherscan into the file.
If you can run “yarn codegen” and nothing breaks, you’re good.
Now, let’s pick these up in a reducer. Add this import to “./src/mapping.ts”:
import { NewExchange } from '../generated/UniswapFactory/UniswapFactory'And this reducer:
export function handleNewExchange(event: NewExchange): void {
	log.error("Exchange created {}", [event.params.token.toHexString()])
}
I commented out the previous log to remove some noise. Go ahead and deploy again, then go to the logs in your subgraph url.
That wasn’t too hard was it?
🤘
We need entities!
So far, we’ve only traced out the data. It’s time to create some query-able entities with it. If you noticed, we declared entities in the manifest file, namely “RegisteredToken” and “UniswapExchange”, but we haven’t used them yet.

Kylo Ren, thinking about subgraph entities.
Entities are defined in schema.graphql, which is a regular GraphQL syntax file. Let’s do so. Replace the existing Gravatar entity, which came with the template, with this:
type RegisteredToken @entity {
  id: ID!
  address: Bytes!
}

type UniswapExchange @entity {
  id: ID!
  address: Bytes!
  token: Bytes!
  isErc777Token: Boolean!
}
Every entity needs to have a unique ID. That’s pretty easy, we’ll just use the token and exchange addresses, since they’re guaranteed to be unique.
There’s not much to the GraphQL schema syntax, other than the “!” which looks kind of tense to be honest. No worries, it simply marks the property as required, i.e. it can’t be null.
Go ahead and run “yarn codegen” again. This will add typed entities to “generated/schema.ts”. As we can import typed abi stuff from the generated artifacts, we’re also able to import typed schema types in a subgraph.
Now, let’s update our reducers to actually create entities with the incoming data. First, import the schema types:
import { RegisteredToken, UniswapExchange } from '../generated/schema'Next, update the reducers to look like this:
// New tokens

export function handleInterfaceImplementerSet(event: InterfaceImplementerSet): void {
	if (event.params.interfaceHash.toHexString() != '0xac7fbab5f54a3ca8194167523c6753bfeb96a445279294b6125b68cce2177054') {
		return
	}

	let tokenAddress = event.params.addr
	let tokenId = tokenAddress.toHexString()

	let token = RegisteredToken.load(tokenId)
	if (!token) {
		token = new RegisteredToken(tokenId)
		token.address = tokenAddress
		token.save()
	}
}
// New Uniswap exchanges
export function handleNewExchange(event: NewExchange): void {
let exchangeAddress = event.params.exchange
let exchangeId = exchangeAddress.toHexString()
let exchange = UniswapExchange.load(exchangeId)
if (!exchange) {
exchange = new UniswapExchange(exchangeId)
exchange.address = exchangeAddress
exchange.token = event.params.token
exchange.isErc777Token = false
exchange.save()
}
}So, basically, we first check if a corresponding entity exists by trying to load it. If it doesn’t, we create and save it. This is a pretty common pattern in subgraph creation.
If you deploy the subgraph again, and hit the play button in the subgraph’s page, you should see a few entities being picked up. This is great, it's working! But the entities are unrelated so far. What we need to do now is link them together.
If for some reason your subgraph crashes while indexing, you can always use the log.error() trick I showed you before.

Kylo Ren, trying to figure out why his subgraphs keep crashing.


And finally thrashing his dual display iMac pro setup, again.
Putting it all together
Ultimately, we want to populate the “isErc777Token” property of UniswapExchange entities with “true”, whenever we confirm that their associated token is an Erc777. This should occur in two cases:
a) A new exchange is created for a token that has already been detected, and so a RegisteredToken entity has already been created for it.
b) A token is registered, with an existing exchange, and so a UniswapExchange entity already exists for it.
In any case, we set “isErc777Token” to true whenever either of these things happens. I’ll actually leave this part as “homework” to you guys, and just provide a simple quick hack that yields a reasonable amount of positive findings. Just change the line where “isErc777Token” is set, to this:
exchange.isErc777Token = !!RegisteredToken.load(event.params.token.toHexString())
Now deploy the subgraph and use this query to finally reveal the Erc777 tokens in Uniswap:
{
  uniswapExchanges(where: {
    isErc777Token: true
  }) {
    id
    address
    token
  }
}
If you let the subgraph sync for a bit, you should start getting some results.
Tip: You may want to use the biggest startBlock for both data sources to sync your subgraph faster... Does it make sense to index Uniswap exchanges before the 1820 registry existed?
There you go 🌶️🌶️🌶️
What now?
This is all I’ll be showing you today folks. By now, I think that you should have everything you need to continue this experiment on your own. You may want to populate your UniswapExchange entities with how much liquidity they have, for which you’d probably have to link to some other event. This might even involve communicating with contracts from your subgraph, which is something also pretty common in subgraphing, and totally awesome.
This was just a spicy experiment I used to illustrate how creating subgraphs is not hard at all. With this knowledge, nothing really stops you from creating a subgraph that indexes a protocol’s data from end to end, and powers your dapp. But to me, subgraphs are so much more than that.
To be able to query subgraphs feels like having a superpower. To be able to create the subgraphs you query is… well, I don’t know. I’ll leave that one to your imagination.
May you live long, and prosper 🖖


